Connecting MySQL to NetBeans
When learning any programming language, at some point it may be necessary to extend your skills and knowledge by learning databases and connecting one to the IDE.
In this tutorial we are going to discuss how to connect a MySQL database to NetBeans IDE to work with it using Java.
First of all, the following components are required to be downloaded and installed:
- NetBeans IDE
- MySQL server
- MySQL Workbench (to manage databases)
- MySQL connector for Java
MySQL Connector/J comes in an archive, so it is necessary to extract the .jar file from it, which is actually a connector. (It should have a name of ‘mysql-connector-java-x.x.x.jar’, where ‘x.x.x’ stands for the version of connector.)
First, it is necessary to add this connector to the folders where current JDK and JRE are located. This is vitally important in order to be able to use it when writing a Java program.
Default paths to locate the connector are:

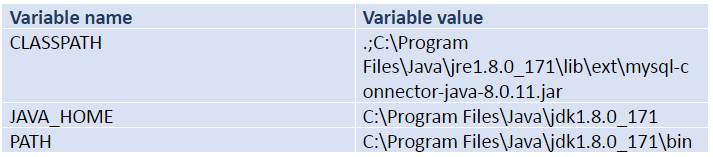
Also, it is necessary to add the location of the connector to CLASSPATH and add some other system variables. (If this is not done, an error may occur.)
Go to Computer -> Properties -> Advanced system settings -> Environment variables. Click ‘New’, and add the following variables with the parameters:
Once this is done it is possible to configure MySQL and create programs using a MySQL connection.
MySQL configuration includes setting up a username and password. The default name is ‘root’ and the password is empty (for this example I have set the password to be ‘admin’).
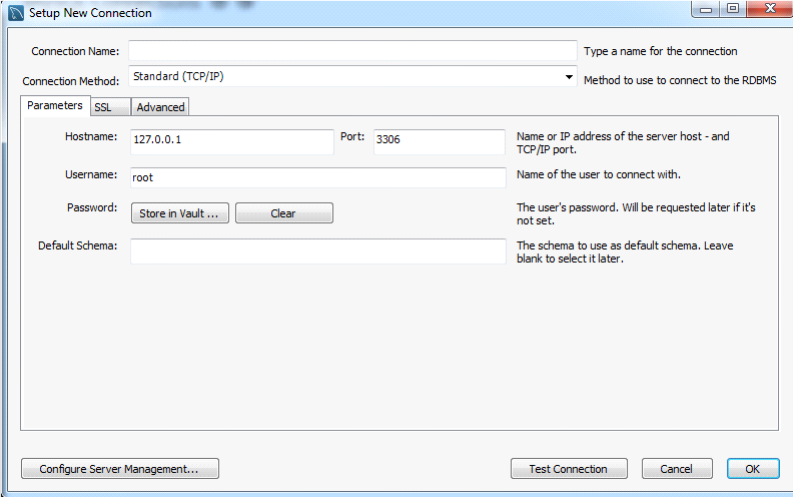
Default Connection settings
When connection is activated, it is possible to create a database in it. For this project, the database ‘feedback’ has been created, along with the table ‘project’. In the Workbench it is possible to do this using either through the interface or by writing queries like these below:
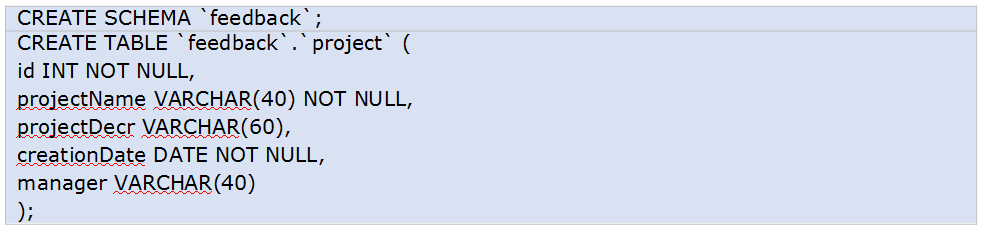
Now it is possible to connect to this database and table from NetBeans, operate on it, and make any other actions.
Finally moving to the IDE, go to the Services tab, right click on ‘Databases’ and select ‘Register MySQL Server’. I have entered ‘root’ as the user name for the administrator and ‘admin’ for the password in the Basic Properties tab. In the Admin Properties tab, the following properties shown in the screenshot are set. Note that the admin tool here is MySQL Workbench, but it can be any other tool (for example, XAMPP).
After this, it is necessary to establish a new connection (Services tab, right click ‘Databases’ and select ‘New Connection’). Make sure to use the appropriate connector, as by default an older connection is used (the corresponding screenshot shows the right connector selected).
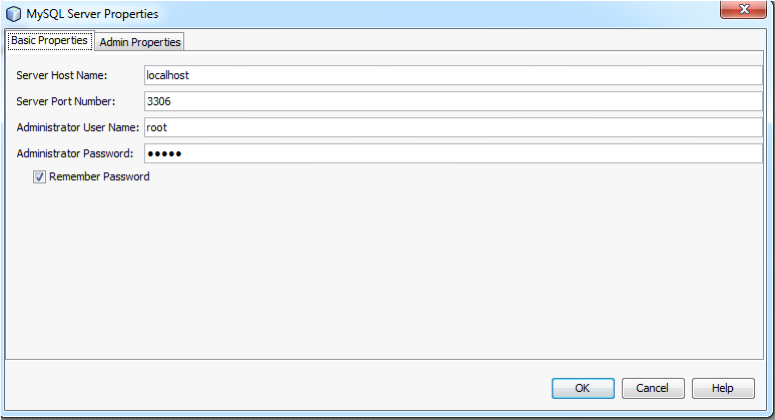
Setting up basic properties for MySQL Server
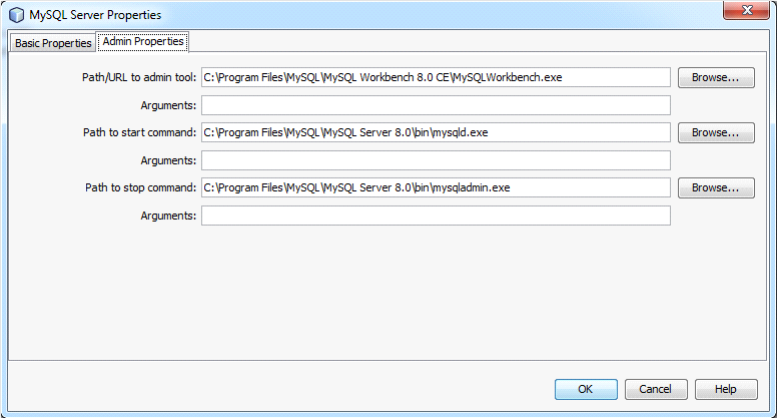
Setting up admin properties for MySQL Server
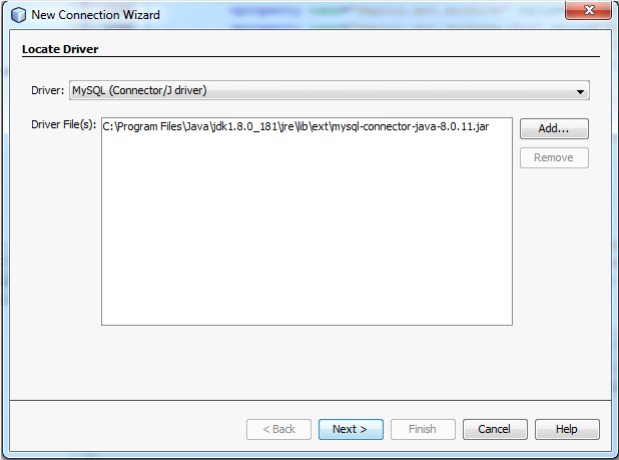
Establishing connection in NetBeans
The following default properties did not work for me:
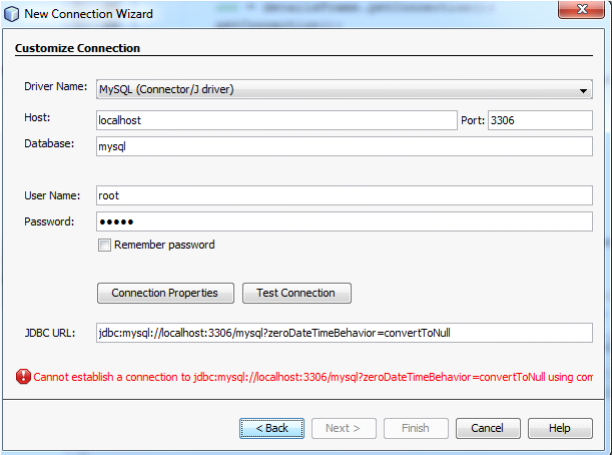
Connection not established
But after changing and adding variables, connection was established.
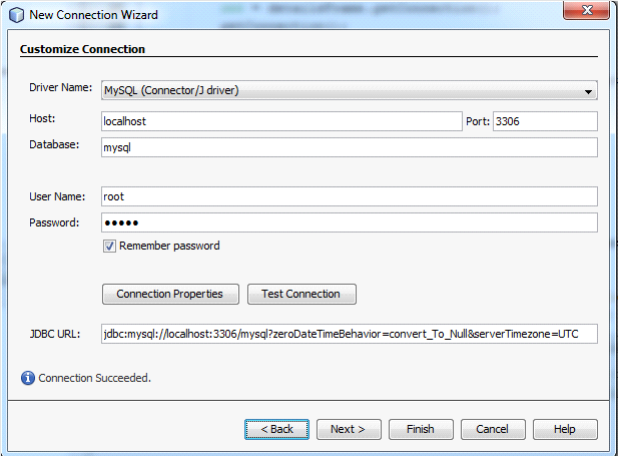
Connection established
So, at this point it is possible to use this connection and operate with it in the program.
This tutorial was developed by our technical experts who have extensive experience in creating technical analyses, tutorials, and guides. Not only can you broaden your proficiency in how to connect MySQL database to NetBeans IDE with our tutorial, but also use it as a completed assignment for your class. Our blog features many more similar tutorials, where our technical masterminds demonstrate their skill far beyond the mysql netbeans field.
The AssignmentShark service boasts a five-year history of delivering high-quality assistance to students. Our experts will perform any kind of technical assignment for you and please you with excellent quality and timing for your order! The professionalism and expertise of our team have made us a household name in the academic writing industry and have brought us a spotless reputation among our competitors. If you are no longer willing to spend your time on completing tiresome technical assignments, ask our prodigies for assignment help!