We hope that this guide will help you learn how to use shape layer. After Effects is a popular image and video editing software. Usually, it is used for creating music videos, commercials, art clips, animated video for television and internet, and more. If you want to learn how to use After Effects, leave yourself plenty of time. You will need diligence and patience to learn all tools and functions. This guide is only a drop in the ocean, as this software gives an endless number of possibilities.
If you enjoy reading our guide about animating shape layers in After Effects, you can find more guides connected with architecture and design on our blog. All samples and guides were written by our expert writers, and are totally free. Besides, if you will need help with your assignments, you can request ‘do my computer science assignment.’ If you value your time, AssignmentShark.com can do the most difficult or annoying assignments for you. Our service is available 24/7, so you can leave the order right away. List the specifications, set the due date, pick the most suitable expert in your discipline, and get a finished work on time.
How to Animate Shape Layer with Adobe After Effects
Task: understand how to make shape layer animation using Adobe After Effects.
Solution:
Shortly after reading this tutorial, you’ll be turning squares into circles in their simplest form as a pro.
So the steps are the following:
1.Create a new composition.
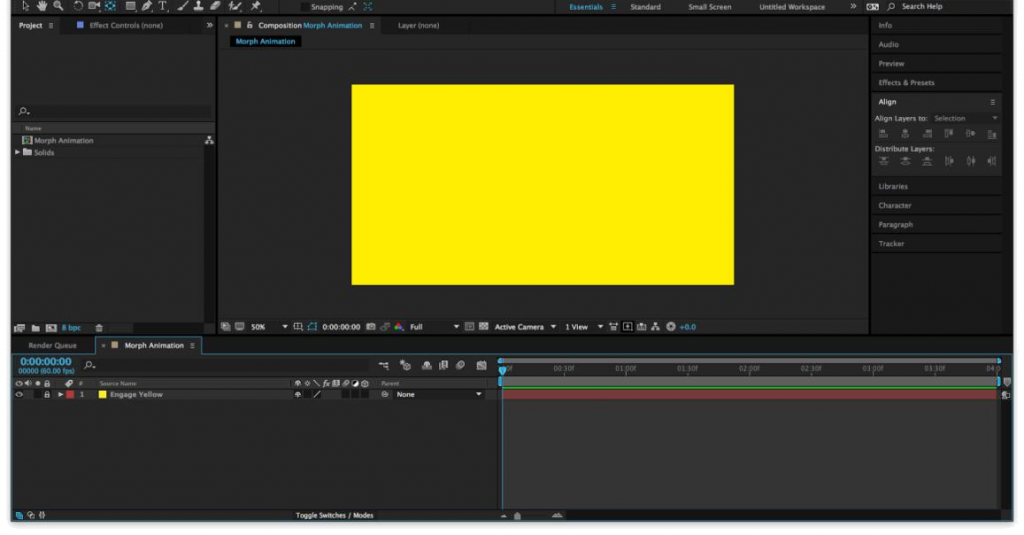
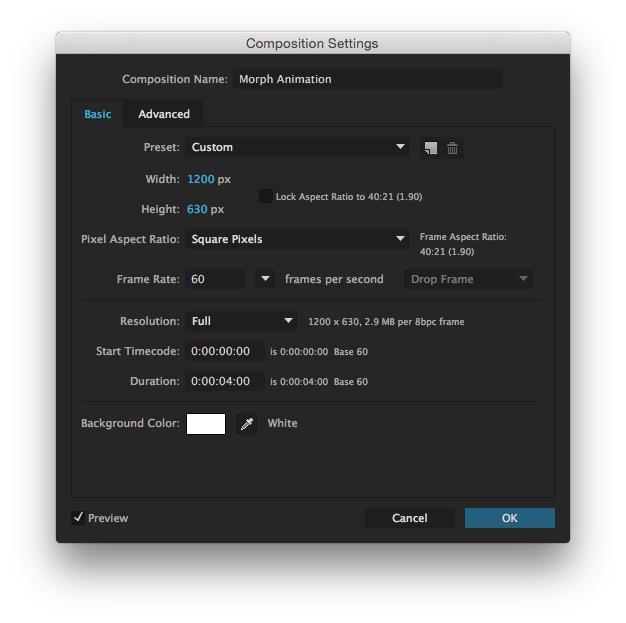 In a new project, create a new composition. In this example I’ve gone for 1200px x 630px as that’s the size of our blog headers. I’ve set the duration to 4 seconds, as this is just enough time to morph the shape, hold the new shape for one second, morph it back to the original shape, and hold that for one second.
2. Add a background.
Create a new solid layer and give it a color. I’ve opted for the lovely Engage Yellow #FFEE00. This will become your background layer. Lock this layer so it doesn’t interfere with the rest of the process.
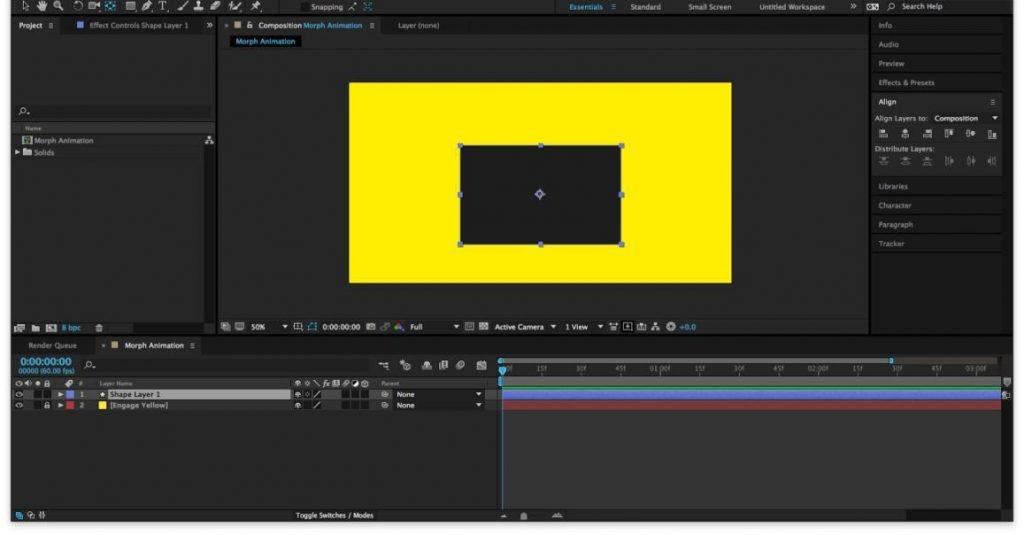
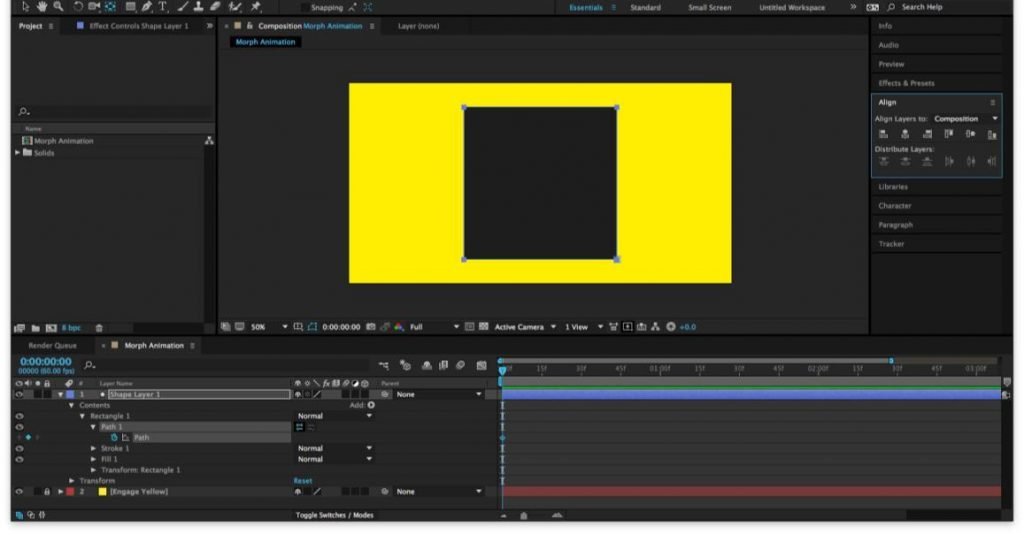
Using the rectangle tool, draw a rectangle on the composition. Don’t worry too much how this looks as this won’t be your actual morphing shape.
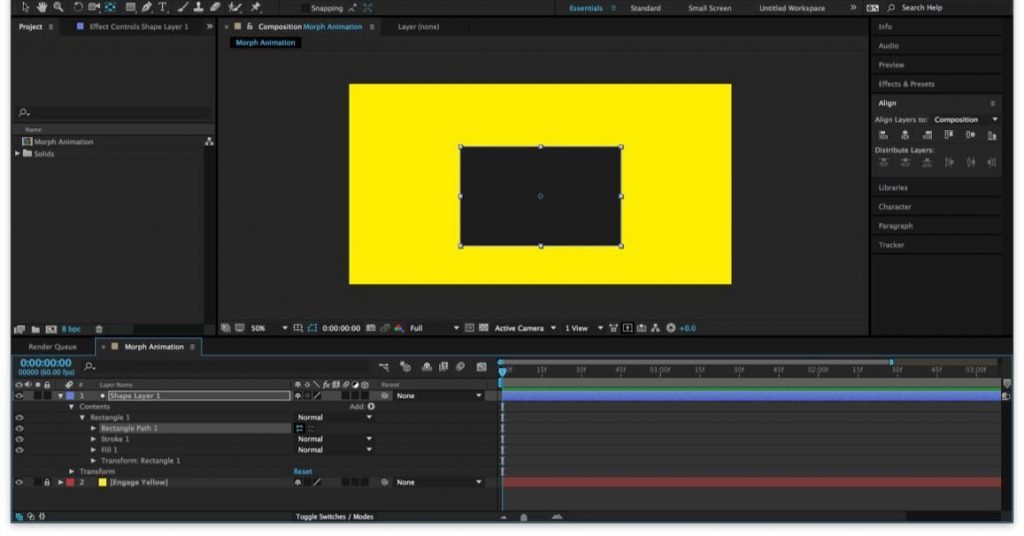
Drop down the shape properties and go into contents, then rectangle 1. Right click on rectangle path and convert this to Bezier path. This will change the rectangle into a keyframable path with the ability to morph into different shapes.
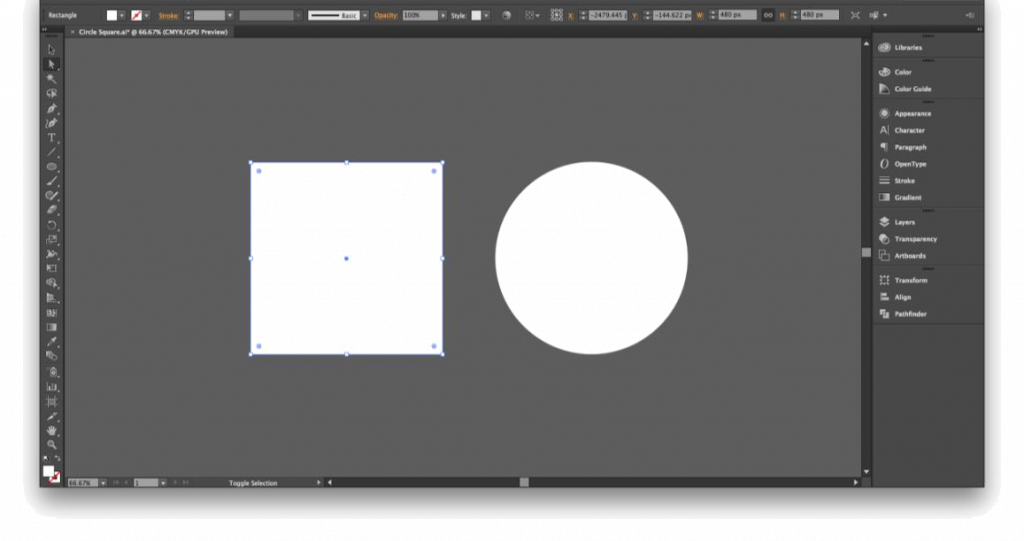
We now need to draw the shapes we want to morph. You can do this in After Effects, but for this example I’m going to copy and paste my paths from Illustrator. This way works well because Illustrator is actually tailored towards creating vector shapes. Here you can see I’ve drawn a 480px x 480px circle and square. Using the white mouse cursor, select the square and hit copy.
Back in After Effects, ensuring that your current time indicator is at the start of your timeline, open path 1 and tap the little stopwatch icon to insert a key frame at the start of the timeline.
7. Paste your shape on the timeline.
With the current time indicator still in the same place, paste your shape and use the alignment tools to center it on the composition.
8. Paste your second shape.
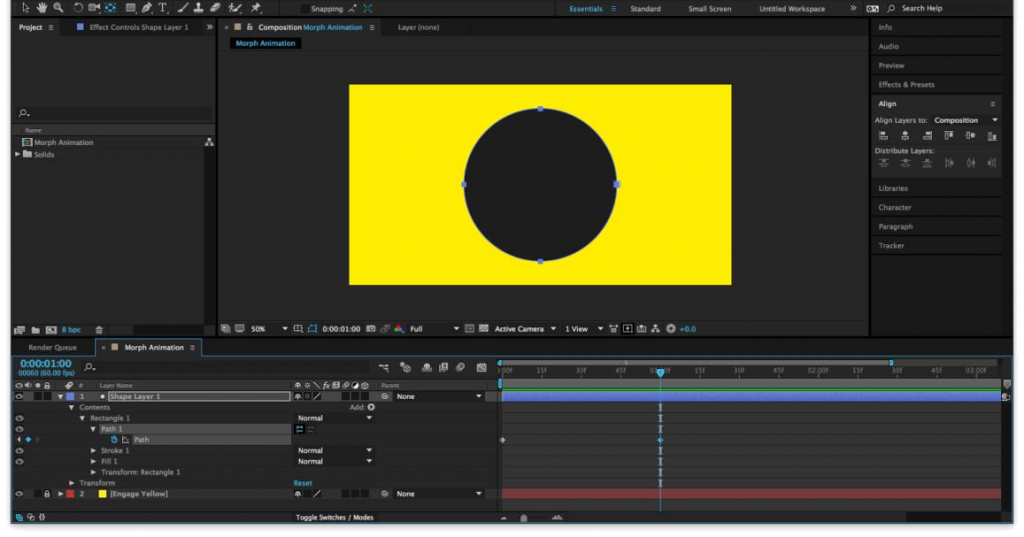
Now we need the circle. Jump back over to Illustrator and copy the circle. Returning to After Effects, move the current time indicator along to 1 second and with path 1 selected, hit paste.
9. Check your animation.
What you have now created is a transition between two different shape paths. If you scrub along the timeline you should see this transition taking place.
10. Pause the animation.
To wrap the animation up we want the new shape to pause for one second and then morph back into the original shape. To do this simply copy your second key frame, move the current time indicator to 2 seconds and hit paste.
11. Complete the loop.
Now, we will revert it back to the original shape. Copy your original key frame from the start of your timeline, move the current time indicator along to 3 seconds and hit paste. This will create the transition back to your original shape and complete the loop. Hit spacebar to preview your animation. Hopefully it should look something like this.
12. Finishing touches
Add some finishing touches by highlighting your key frames. Right click on one, go to key frame assistant and add easy ease. You could also try keyframing in some rotation to create a better morphing illusion.
And shape morphing with After Effects is complete.

